Do
it yourself : stencil markings
first step, an easy shape: the american star…
By
Renaud POUGE
| To
realise great american stars, you will have to proceed as shown here.
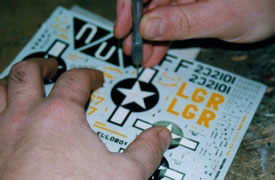
On a decal sheet, i find a star similar to the one i need.
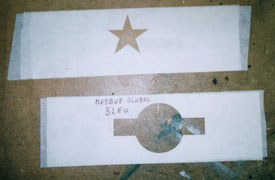
With a dry nail,
i mark on an adhesive tape sample the 5 corners of the star.
With a new blade, i cut this 1st stencil, and keep it. |
 |
 |
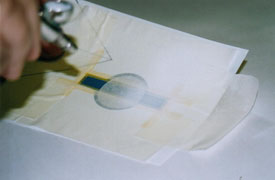
The
circular background & the stripes are cut in another adhesive
tape sample. In order to do so, i still mark with a dry nail the center
of the star (also center of the disc), a point on the periphery of
the disc & the four corners of the stripes. With
a blade compasses, i remove the disc & stripes. |
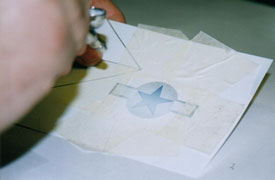
| After
applying this stencil, i airbrush blue painting. When it's dry, i
remove the 1st stencil.
With the help of Tamiya adhesive tape, i mask the blue outlines of
the stripes which width (depending on the size of the star) can be
seen by transparancy through the stencil.
|
 |
 |
A
disc of the diameter of the star is then applied to the center in
order to give the curved side of the stripes. The
surrounding space is then masked & the white coat, slightly darkened
with grey 36440 of the stripes is applied.
When this part is dry, you obtain a blue disc & two white stripes. |
| I
finally apply the star shaped stencil (the one i had kept). If you
had well marked your star, 2 corners of the star should coincide with
2 angles of the stripes.
A last white coat, & 'voilà'... you've just made you're
1st stencil american star. |
 |
|